Docker is a powerful platform that allows developers and system administrators to build, ship, and run applications in lightweight, portable containers. This guide covers the core concepts and essential commands needed to get started with Docker. The post will help you navigate the basics of working with Docker images, containers, and the command-line interface.
First, we will install Docker
sudo apt-get update
sudo apt-get install ca-certificates curl
sudo install -m 0755 -d /etc/apt/keyrings
sudo curl -fsSL https://download.docker.com/linux/ubuntu/gpg -o /etc/apt/keyrings/docker.asc
sudo chmod a+r /etc/apt/keyrings/docker.asc
echo \
  "deb [arch=$(dpkg --print-architecture) signed-by=/etc/apt/keyrings/docker.asc] https://download.docker.com/linux/ubuntu \
  $(. /etc/os-release && echo "${UBUNTU_CODENAME:-$VERSION_CODENAME}") stable" | \
  sudo tee /etc/apt/sources.list.d/docker.list > /dev/null
sudo apt-get update
Install the Docker packages
sudo apt-get install docker-ce docker-ce-cli containerd.io docker-buildx-plugin docker-compose-plugin -y
Verify that the installation is successful by running the hello-world image:
sudo docker run hello-world
We can check the version of docker and more useful information with the following commands.
sudo docker --version
sudo docker info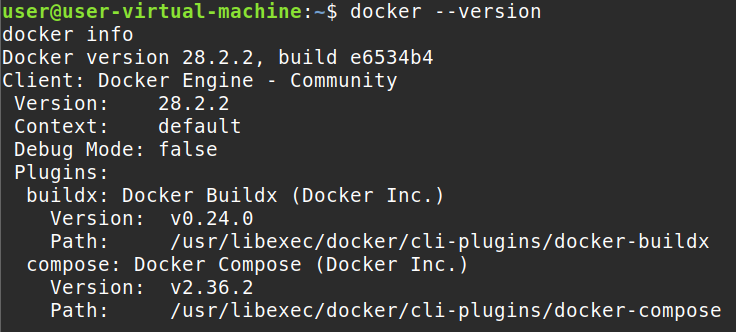
Switch over to the root user so you do not need to use the sudo command anymore. This is not recommended in a production environment due to security reasons but is acceptable for this lab setting.
su - rootWe will begin with creating our first docker container. To do that we can run this command
docker run ubuntu
We can see that it automatically downloaded the image because we have no images named ubuntu. We will get into imaging more later. We can check out all our running containers by issuing the following command:
docker ps
Nothing is running, why? When we say docker run ubuntu without -it, it will start and exit immediately because no interactive terminal is allocated. We can view the immediate exit by issuing this command which will show us all containers even the ones that are stopped.
docker ps -a
We can see it immediately exited because no -it (interactive terminal) was used. Let’s retry this.
docker run -it ubuntuBefore we run this it’s important to note no command was included. By default, the command that’s going to be issued by the ubuntu image will be /bin/bash but some images will not issue default commands. You could explicitly tell the container to run a command by doing:
docker run -it ubuntu /bin/bashYou could also issue this command with -dit instead of -it to run it in detached mode. Detached runs the container interactively in the background. You can later attach to it but we will just use -it ubuntu with no explicit command given.
docker run -dit ubuntu
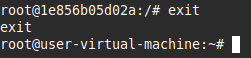
It worked; we are in the container and an interactive terminal has been given to us. By default, the image ran the /bin/bash command. /bin/bash keeps the container alive by running an interactive shell. Without it or a valid command, the container exits immediately because there’s nothing keeping it running. Let’s exit the container by typing exit which will exit the container and shut it down.
We can see we have two containers now with the newer one being named priceless_bouman. You can also see under COMMAND that the ubuntu image is by default issuing the /bin/bash command to keep the container alive so that we can use the interactive terminal.

Let’s start up priceless_bouman (1e856b05d02a) container and instead of exiting from it we will detach from it instead.
docker start priceless_boumanNow we must attach ourselves to the container after it has been started by issuing the following command:
docker attach priceless_boumanEarlier we typed exit which would shut down the container but we only want to detach which means it will still run in the background. Issue Ctrl + P, then Ctrl + Q on your keyboard. This will make you leave the container and send it to the background.

We can see under STATUS that priceless_bouman is still UP which means we successfully detached from the container without shutting it down. It is now running in the background. Let’s stop the container now but this time I will use the container ID. You can either use the name or container ID when referring to a container.
docker stop 1e856b05d02aWe can restart containers by using
docker restart 1e856b05d02a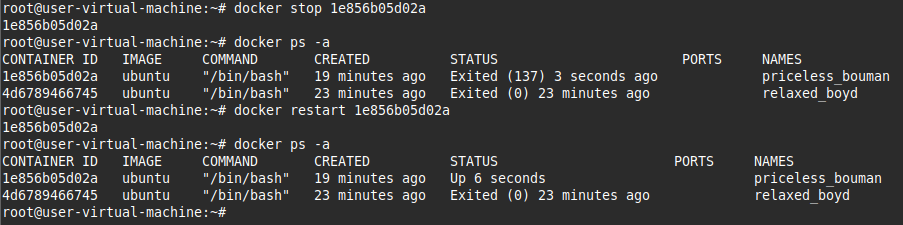
You can issue commands to the container straight from the run command when you are first setting up containers.
docker run ubuntu echo "Hello from nodetechsystems"
Let’s issue commands to priceless_bouman (1e856b05d02a) which is still currently up right now because we restarted it not long ago. We will use the docker execute command.
docker exec -it priceless_bouman mkdir nodetechsystems
docker exec -it priceless_bouman ls
docker exec -it priceless_bouman echo “We are issuing commands in this container”
We created a directory called nodetechsystems, we then did ls to display the current present working directory in the container and we echoed “We are issuing commands in this container.” Docker exec Let’s us issue commands without attaching to the container itself.
Earlier, we covered the -d flag, which runs a container in detached mode (in the background). If you start a container with just -d and don’t include -it, that’s ok because you can still open an interactive shell inside the running container later using:
docker exec -it priceless_bouman /bin/bashLet’s check out the logs of the priceless_bouman (1e856b05d02a) container which is still running. I have entered the container and issued some commands to demonstrate the logging. The docker exec commands wouldn’t have been logged because docker exec launches a separate process inside the container itself.
docker logs priceless_bouman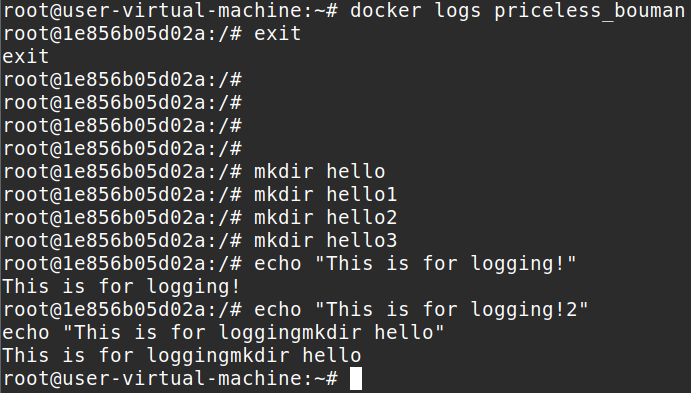
This is a useful command to see what commands are entered when attached to the container. It only logs the main process of the container which is why there is no logging of the docker exec commands.
Let’s remove all the docker containers we have right now. Notice I put -f which means force because this command will not work on containers that are running unless you add -f.
docker rm -f ee4afe29e8b3 1e856b05d02a 4d6789466745
Let’s look at our images that we currently have installed.
docker images
We can see we have two images. Both were automatically pulled when we ran the docker run commands earlier.
Let’s remove the two images. Docker will attempt to remove each image in the order listed. If any of the images are in use by a container, you’ll get an error unless you force the removal with -f. Using -f on images while having running containers using those same images will cause problems. We don’t have any containers to be concerned with so we will just use -f anyways.
docker rmi -f ubuntu hello-world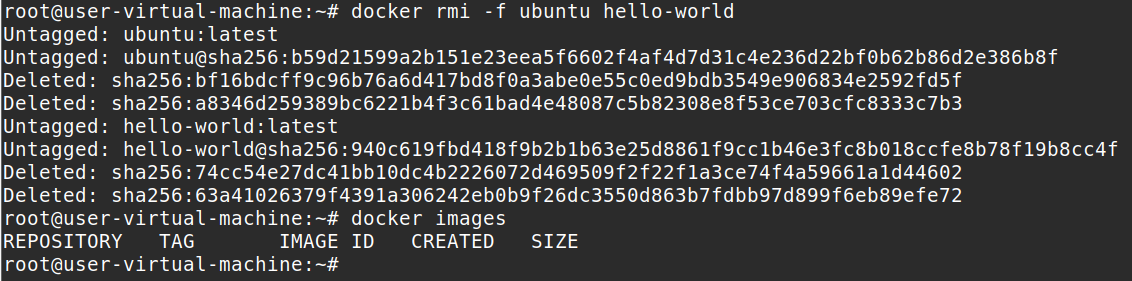
You can refer to the images by repository or the image ID. An alternative would have been docker rmi -f bf16bdcff9c9 74cc54e27dc4
Let’s pull a custom image
docker pull fispact/linuxmint
Let’s create a container with a custom image that we just pulled and a custom name. We will use docker create instead of run. Docker create is useful cause you can create the container and start it later while Docker run immediately runs it after creating it. We will also add in a default command at the end which will run when we start the container. Without /bin/bash our container would just immediately exit out.
docker create -it --name nodetechsystems fispact/linuxmint /bin/bashStart the container up afterwards
docker start nodetechsystems
docker attach nodetechsystemsIssue a command inside it.
mkdir nodetechsystems-directoryLeave the container Ctrl P then Ctrl Q
We will now build a custom image with this container by running this command:
docker commit nodetechsystems techimage
We built a custom image that contains the configuration information from nodetechsystems container. Then quickly we tested that image by making a new container and seeing that it indeed did contain the directory called nodetechsystems-directory which is the directory we created in the nodetechsystems container.
You can push images to docker hub with the following command:
docker push yourusername/myimage:tagIt will fail if you do not first use this command to login to docker hub with this command.
docker login -u <username>Once you put your username in, it will then prompt you to insert your password. I wont be showing this and this part is unnecessary but a good feature to know if you want to upload images to docker hub. Instead, I will show you how to import/export images.
To save a docker image to a .tar file. The tag at the end (:latest) is optional but recommended, especially if you are working with multiple versions of an image.
docker save -o node.tar techimage:latestAn alternative save command:
docker save techimage:latest > node.tarA .tar file can be loaded in as a docker image with this command:
docker load -i node.tar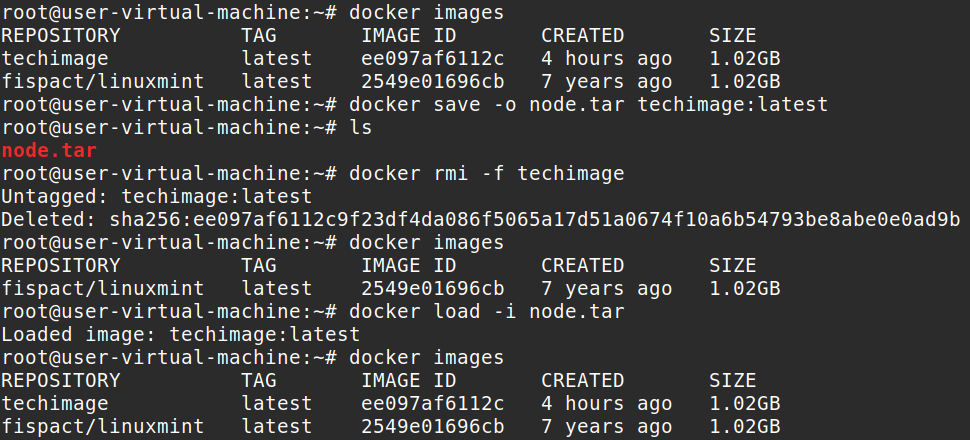
What is shown in the above screenshot is saving the docker image to a .tar file then deleting the image locally. After that I load the image back in using the .tar file that I just saved. This is a very useful feature for moving images in between machines without having to push and pull to docker hub. You could just use a USB and move the .tar files between machines.
Another important feature is Docker volumes. Containers are ephemeral, by default, any data written inside a container is lost when the container stops or is removed. Docker volumes solve this problem by providing persistent storage that exists independently of the container’s lifecycle. This is essential for storing database data, preserving important configuration files, sharing data between multiple containers, and ensuring that application data survives container restarts or recreations without needing to rebuild images or manually reapply changes.
Let’s create a volume
docker volume create storage-nodeTo list volumes:
docker volume lsTo show detailed information, like the mount point on the host run the volume inspect command:
docker volume inspect storage-nodeThis removes the volume only if it’s not in use by any container.
docker volume rm storage-node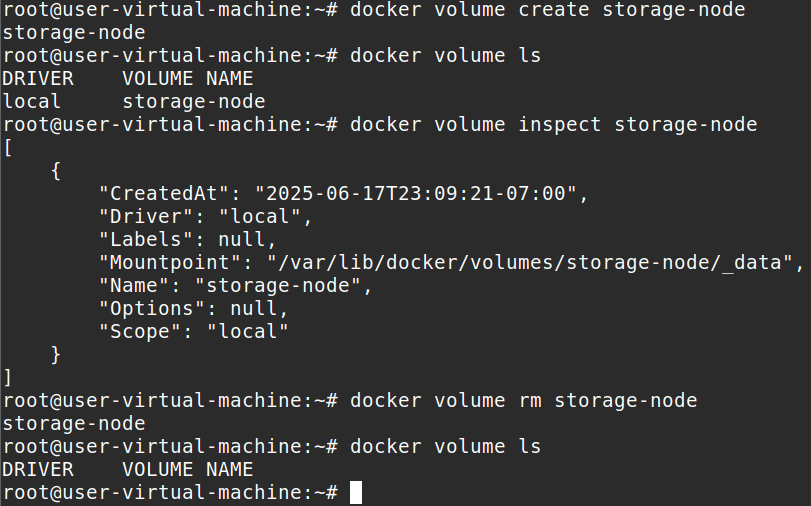
Here is an example of running a container with persistent storage by using volumes. I am using this formula but you can add whatever flags you want, but the -v is necessary cause it states the volume mount. Docker run [flags] -v [volume_name]:[container_mount_path] [image_name] [optional_command]
This runs a container in interactive terminal mode using the volume storage-node. It mounts this volume to /etc/myconfigs and the container is created with the image: fispact/linuxmint. The command /bin/bash is given which will open a terminal.
docker run -it -v storage-node:/etc/myconfigs fispact/linuxmint /bin/bash
Another useful feature of docker is docker networks. Docker networks allow containers to communicate with each other securely and efficiently. By default, Docker creates a few networks, but you can define your own for better control and isolation
To create a custom network:
docker network create node-networkTo list networks:
docker network ls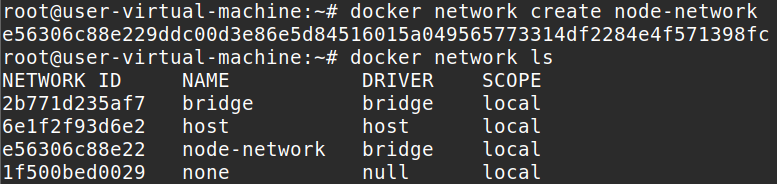
To inspect a networks details like connected containers and ip ranges
docker network inspect node-network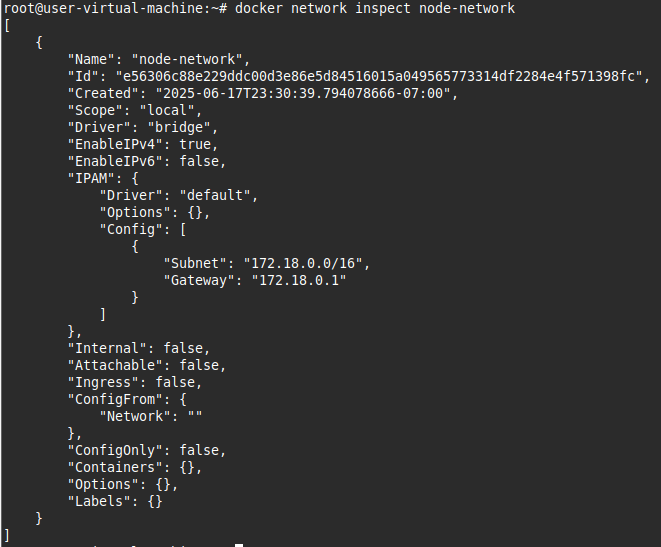
Connect a running container to a network:
docker network connect node-network nodetechsystemsDisconnect a container from a network:
docker network disconnect node-network nodetechsystemsAn example of creating a new container and directly attaching it to a custom network and persistent storage volume:
docker run -it --network node-network -v storage-node:/etc/myconfigs fispact/linuxmint /bin/bashRemove an unused custom network:
docker network rm node-network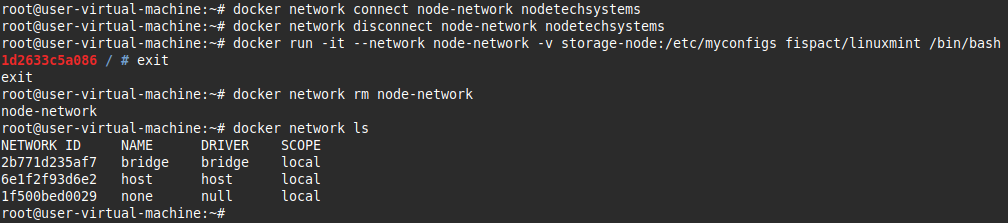
Finally, we will get to doing some basic cleanup. You can run the following commands to perform some cleanup and view space usage
See space usage:
docker system df
Remove unused containers, images, and volumes
docker system pruneRemoves all stopped containers:
docker container pruneRemove unused images:
docker image pruneRemove unused volumes:
docker volume pruneDocker makes containerizing applications easy and efficient. Its not as advanced as Kubernetes but its still good to know incase you just want to deploy some stuff easily for testing and don’t really need an advanced solution or setup.